In the previous post, we created a cloud-native application Moments and deployed it in AWS. However, this application is accessible to anyone with a link to it, which is not secure. We want only authorized users to upload and view photos.
Architecture
In this application, we will use simple email verification-based user login.
To register:
- User enters their email ID on the registration page
- A secret code is sent to the email for verification
- User validates the verification code on the registration page
- On success, the user can set a password for login
Once registered, the user can log in using their email and password.
- Each API call to API Gateway will be checked for authorization before forwarding it to the corresponding Lambda
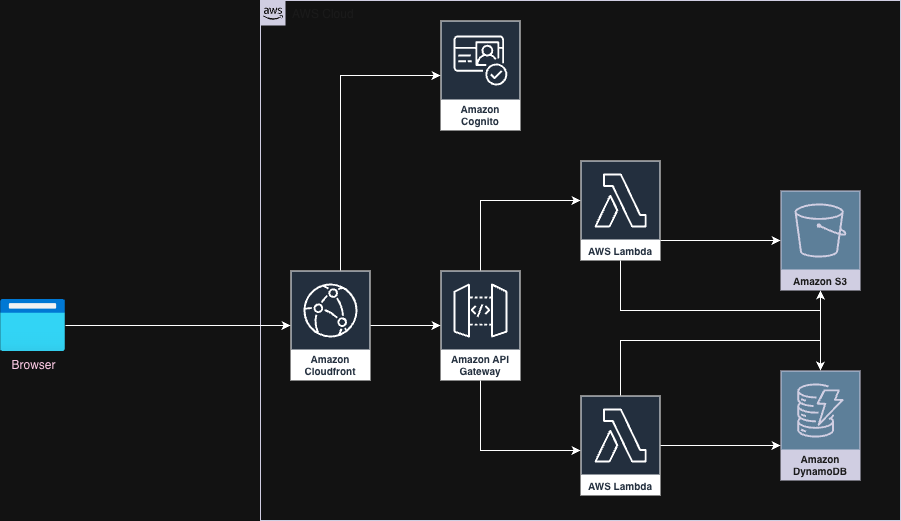
We will use Amazon Cognito for security related services.
Amazon Cognito
Amazon Cognito provides services to secure an application. With Amazon Cognito, we can authenticate and authorize users using standards like OAuth 2.0. It integrates seamlessly with third-party tools for user directory, authentication, and authorization services, if required.
Cognito provides a login screen out of the box. We will integrate it with our SPA. We will use the OAuth 2.0 standard of authorization code flow. The goal is to authenticate a user and get a short-lived access token to be used to make API calls.
**Authorization Server** + **Identity Provider**) spa(React SPA is the **OAuth Client**) gateway(API Gateway + Lambda backend is the **Resource Server**) spa --Authentication--> cognito spa --Authorization--> gateway gateway --> cognito %% Make the first edge (A-->B) green and thicker linkStyle 0 stroke:green,stroke-width:3px; linkStyle 1 stroke:green,stroke-width:3px; linkStyle 2 stroke:green,stroke-width:3px;
We first authenticate the user, followed by authorization checks when making API calls.
Authentication flow
- SPA asks Cognito for an authorization code
- On successful login, Cognito issues an authorization code
- SPA sends another request to Cognito for an access token using the authorization code
- Once the access token is received from Cognito, it will be used for interaction with APIs
This process of authentication and receiving an access token is called Authorization Code Grant.
Authorization flow
- Every call to upload or view photo APIs will need to undergo an authorization check. For this, API calls will have an access token with them.
- API Gateway will check the validity of the access token with the public key it received from Cognito.
- On successful verification, it forwards the API call to the corresponding Lambda.
Control flow of overall application
Following sequence diagram describes:
- Getting authorization code from Cognito (Steps 1 - 6)
- Getting access token using authorization code from Cognito (Steps 7 - 10)
- Validating access token (Bearer token) in the view photos API call (Steps 11 - 14)
- Lambda for View photos API executes and sends response (Steps 15 - 20)
- Similarly, API request to upload photo gets authenticated and responds with a response (Steps 21 - 33)
Zoom the screen to view individual blocks of control flow.
Store access_token (e.g. localStorage)
Set user state (email) end rect rgb(255, 218, 185) Note over U, FE: View Photos (Authenticated) U->>FE: Open "View" tab FE->>API: GET /api/photos
Authorization: Bearer access_token API->>COG: Validate JWT (Cognito authorizer) COG-->>API: Token valid (claims incl. email) API->>LAM: Invoke Lambda with event
(includes requestContext.authorizer.jwt.claims) LAM->>DB: Query moments_photos (ordered by timestamp) DB-->>LAM: Photo items LAM-->>API: 200 OK + JSON list of photos API-->>FE: 200 OK + JSON list of photos FE->>U: Render grouped photos grid end rect rgb(255, 182, 193) Note over U, S3: Upload Photo (Authenticated) U->>FE: Select file & click "Upload" FE->>API: POST /api/uploads
Authorization: Bearer access_token
Body: multipart/form-data (image) API->>COG: Validate JWT (Cognito authorizer) COG-->>API: Token valid API->>LAM: Invoke uploadPhoto Lambda with event LAM->>LAM: Decode multipart body → raw image bytes
Extract filename & content-type LAM->>S3: PutObject (bucket/moments..., key=photos/uuid-filename.ext) S3-->>LAM: 200 OK LAM->>DB: PutItem metadata
{ pk="PHOTO", sk=timestamp#uuid, url=CloudFront URL, uploadDate, ownerEmail } DB-->>LAM: 200 OK LAM-->>API: 200 OK + { key, url } API-->>FE: 200 OK + JSON FE->>U: Show "Uploaded successfully. Key: ..." end
Implementation
Full code can be found here.
Setting up Cognito
Create an Amazon Cognito user pool. This will register our SPA as a client, set up the default login page URL, configure OAuth 2.0 servers, and enable many other related features.
- Navigate to Amazon Cognito –> User pools –> Create user pool
- Choose Application type as Single-page application (SPA)
- Name your application, say, moments-app
- Let Email be the sign-in identifier
- Let Email be a required attribute for sign-up
- Click on create user directory
On the resulting page, you can view the login page. Also, you can see code samples to get started with the integration of Cognito in applications for various programming languages.
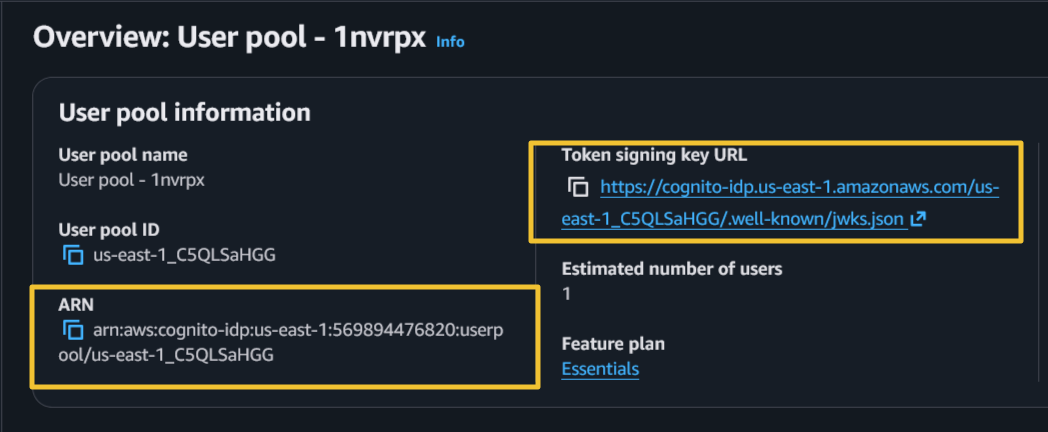
- Note down the Cognito URL and ARN details
Setting up App Clients
Cognito needs information about the clients who are going to use its services.
In our case, the client will be the SPA deployed through CloudFront Distribution. We need to provide CloudFront Distribution details for the client.
By default, the Cognito user pool will have an app client created. We will update it with the client URL details.
- Go to Amazon Cognito –> User pools –> your-user-pool –> App clients –> your-app-client
- Under the Login pages tab, update callback and sign-out URLs. This will be your CloudFront domain URL.
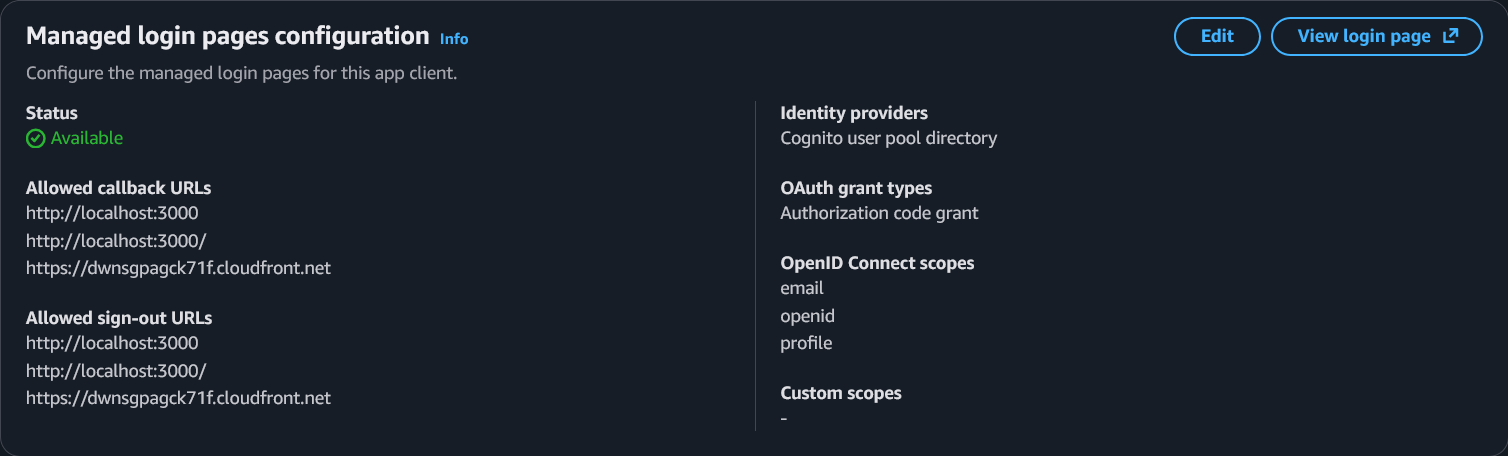
(Optional) Here I have added http://localhost:3000 for local development testing.
Take care of trailing slashes for local testing.
Securing APIs
We will update the API Gateway API that we created in previous posts.
We need to secure the APIs for viewing and uploading photos.
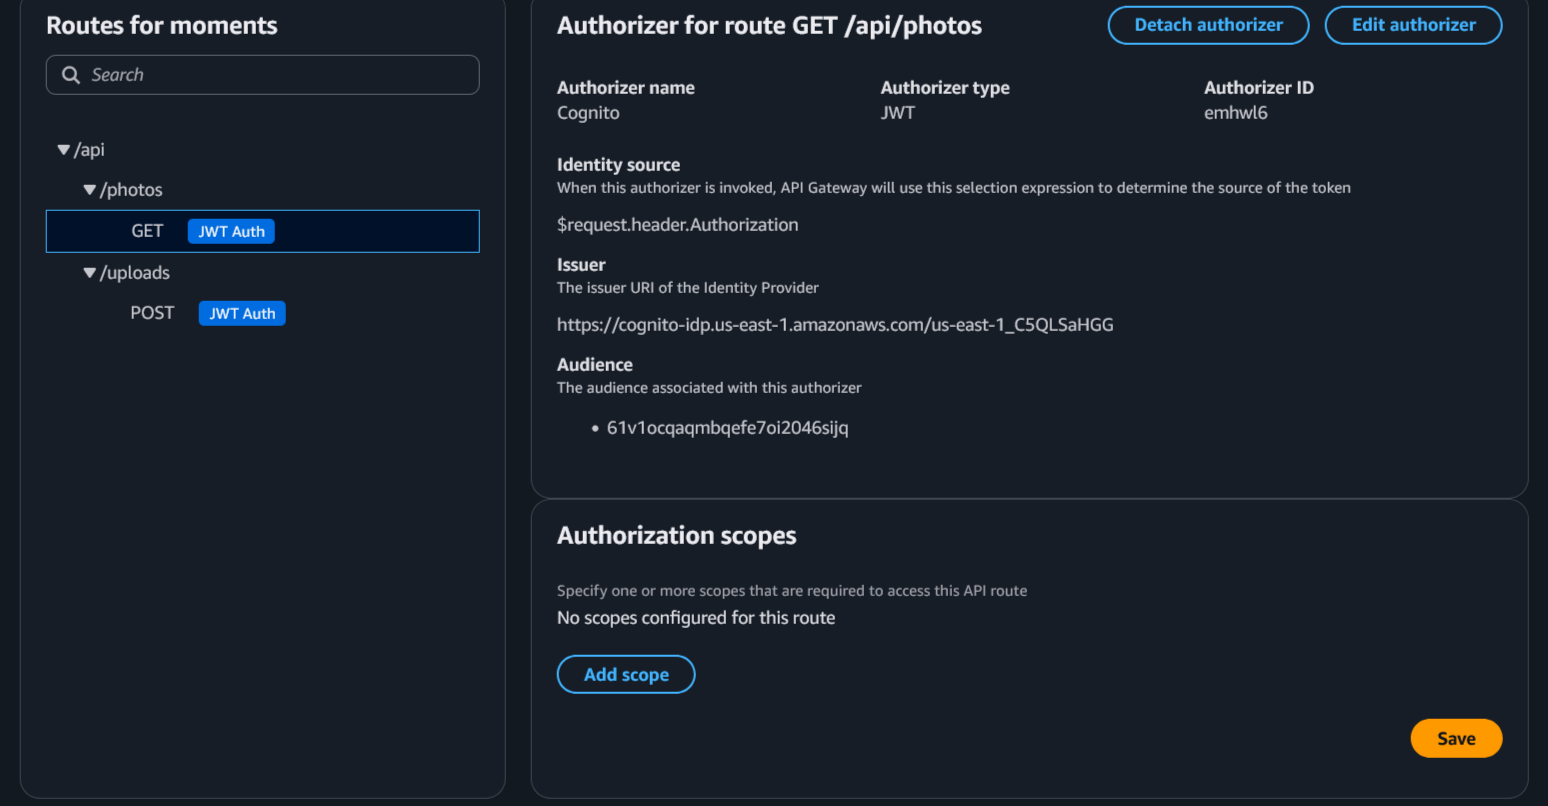
Navigate to API Gateway –> APIs –> your-api –> Authorization
Associate each API with an authorizer.
- Authorizer name should be Cognito
- Authorizer type should be JWT
- Issuer URI can be found on the overview page of the Cognito user pool
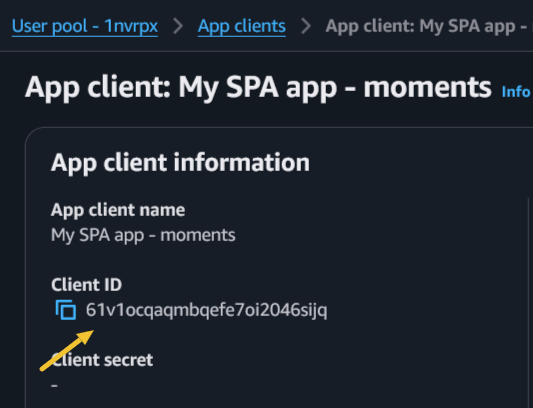
- Audience will be the Cognito client ID
After API association with the authorizer, it will look similar to the following:
Under the CORS section, add
Access-Control-Allow-Headersfor authorization: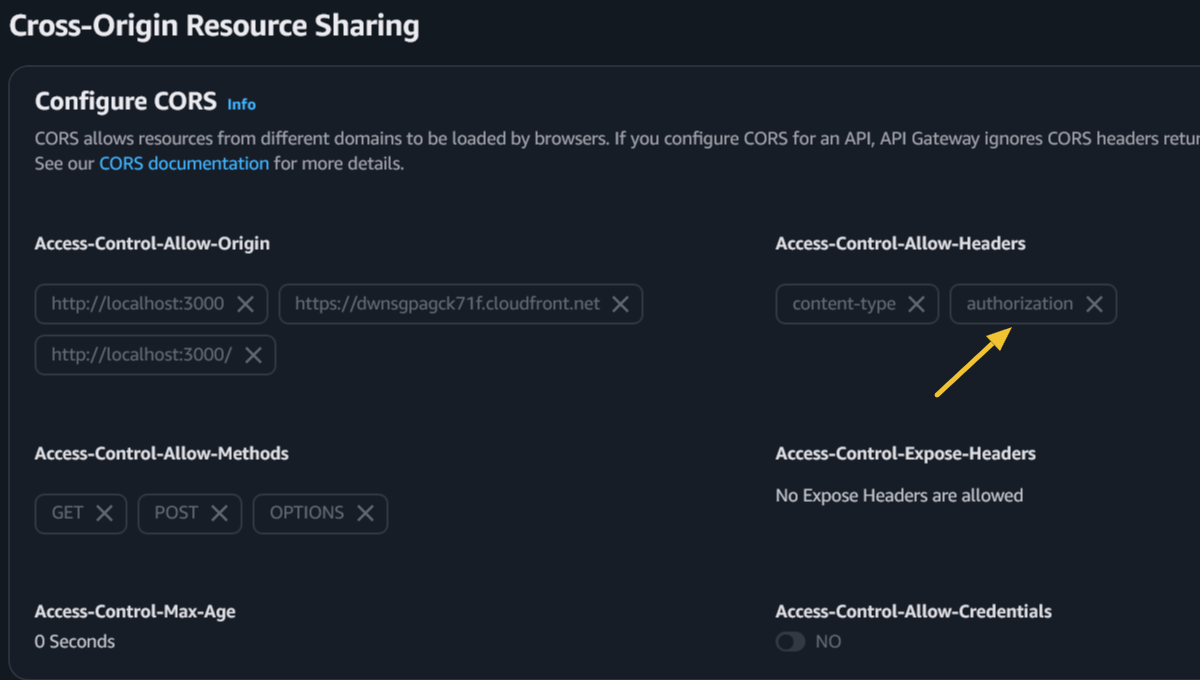
Frontend Changes
- We need to make a call to load the login screen provided by Cognito.
[authConfig.js]
const cognitoAuthUrl = `https://${userPoolDomain}/oauth2/authorize` +
    `?client_id=${encodeURIComponent(clientId)}` +
    `&response_type=code` +
    `&scope=${encodeURIComponent("openid email profile")}` +
    `&redirect_uri=${encodeURIComponent(redirectUri)}`;
This will be called on click of the “Login with Email” button.
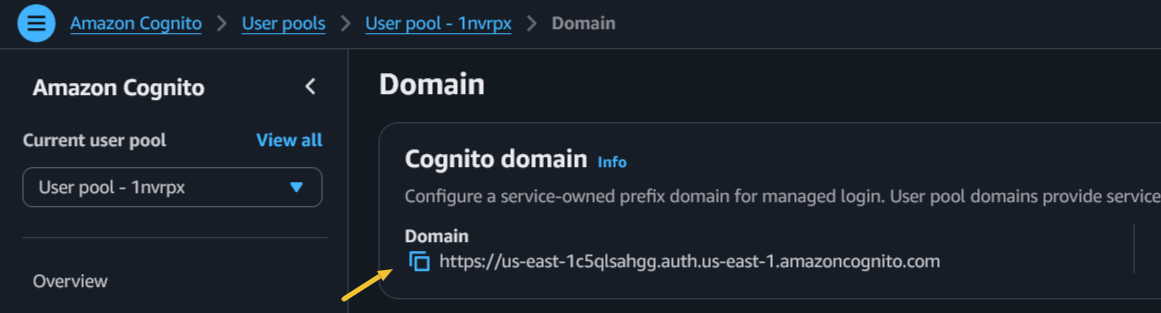
Here, we need userPoolDomain and clientId from Cognito.
 | |
|---|
- Once login is successful, Cognito will redirect to our SPA using
redirectUri. - We receive a code grant from the above call to
../oauth2/authorize. We will use this code to fetch an access token usingtokenUrl-../oauth2/token. - Once the access token is received, it is stored in local storage.
- For further API calls to view or upload photos, the access token is included in the header of HTTP requests.
[App.js]
    const authHeader = authToken
            ? { Authorization: `Bearer ${authToken}` }
            : {};
- On logout, we clear the local storage to ensure the user logs in again with credentials.
Run the Application
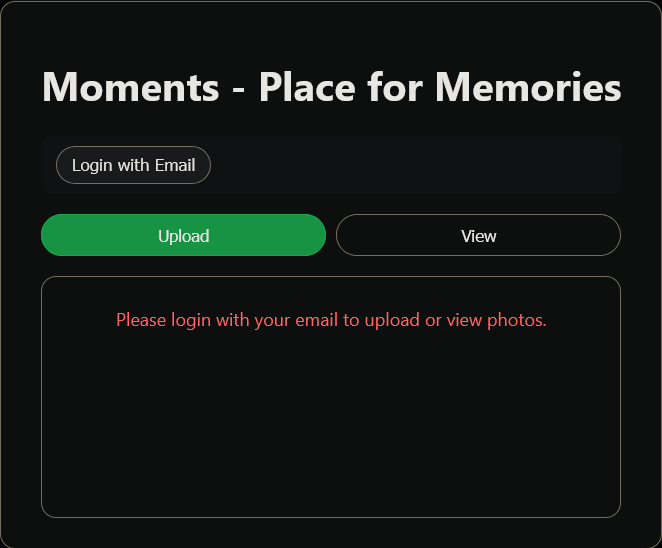
- To run the application, visit your CloudFront domain URL.
E.g., https://dwnsgpagck65b.cloudfront.net/
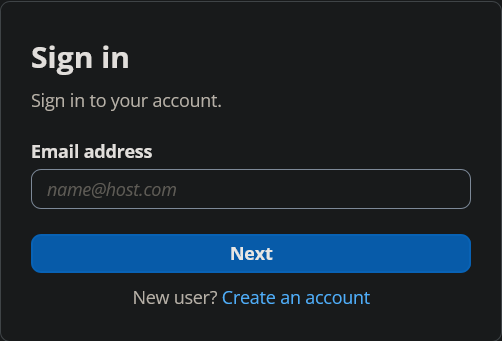
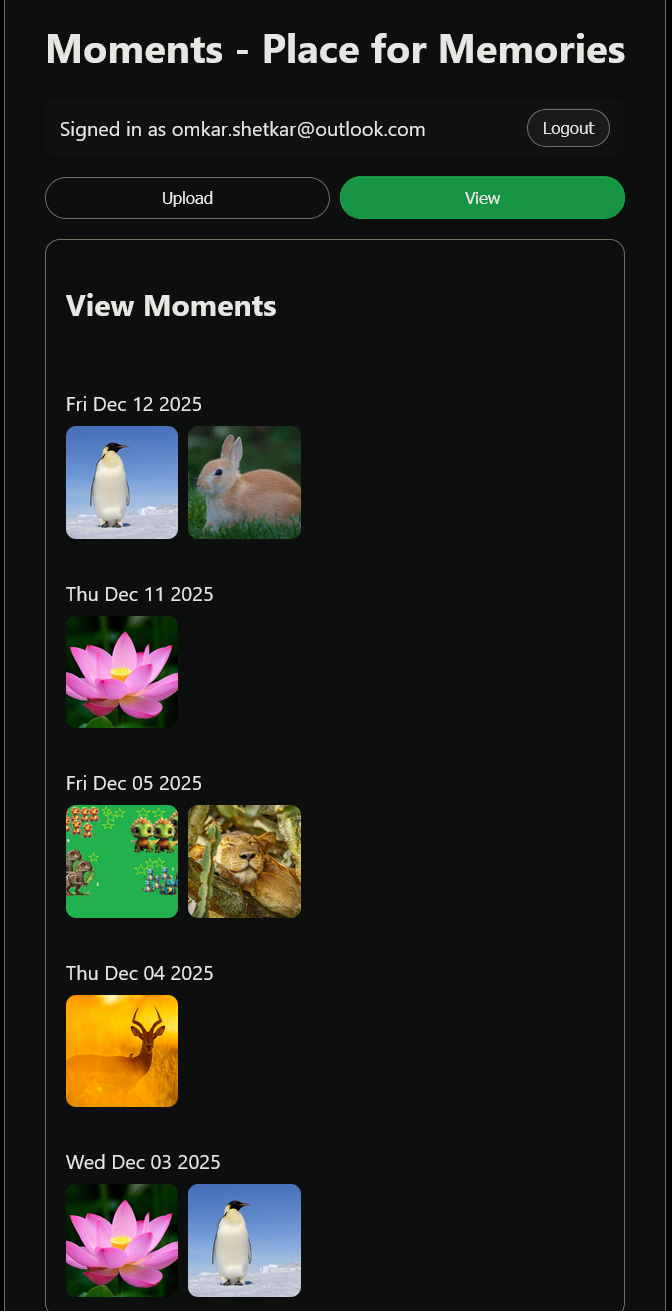
By default, users will see a message asking them to log in to upload or view photos.
First-time users will need to register. Once registered, they can log in to upload and view photos. Once done with application usage, they can exit by logging out of the application.
 |  |  |
|---|
Congratulations 🎉! We have secured the Moments application.
Summary
In this post, we made our serverless application secure by integrating it with AWS Cognito. We integrated with the Cognito login screen and secured APIs with access tokens from Cognito. Thus, only authenticated users will have access to the application APIs. The security mechanism discussed in this post is the building block of many production-grade applications.
Do let me know your thoughts in the comments section below.