We are building Moments, an app to upload and view photos.
In this post, we will create the main features of our app: uploading photos to Amazon S3 and displaying them in chronological order. The frontend will handle user input, while the backend will manage photo storage and retrieval.
By the end, users will be able to upload and view photos.
 |  |
|---|
Architecture
To begin, the frontend and backend will run locally on localhost. Photos will be stored in Amazon S3, while their location URLs and other details will be stored in Amazon DynamoDB.
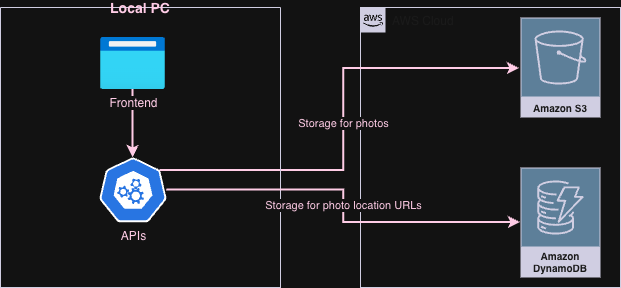
The frontend will use the React framework, while the backend will be built with Spring Boot.
Amazon S3 is a scalable and resilient storage service designed to store objects of any size.
Amazon DynamoDB is a scalable and resilient NoSQL database service managed by AWS.
We primarily have two functionalities:
- Upload a photo
- View uploaded photos in chronological order
Each feature includes its UI components and corresponding APIs.
Initial Setup
Code for this post can be found here.
Frontend
- Let’s build on the application we created in the previous post.
Backend
- Create a Spring Boot application with the following dependencies:
 <dependency>
    <groupId>org.springframework.boot</groupId>
    <artifactId>spring-boot-starter-web</artifactId>
 </dependency>

<!-- Spring Cloud AWS Dependencies -->
 <dependency>
    <groupId>io.awspring.cloud</groupId>
    <artifactId>spring-cloud-aws-starter-s3</artifactId>
    <version>${awspring.version}</version>
</dependency>

<dependency>
    <groupId>io.awspring.cloud</groupId>
    <artifactId>spring-cloud-aws-starter-dynamodb</artifactId>
    <version>${awspring.version}</version>
</dependency>
To interact with AWS services from a Spring Boot application, we will use Spring Cloud AWS. Spring Cloud AWS provides straightforward abstractions to interact with AWS services seamlessly.
- Define following environment variables to interact with AWS Services
spring.application.name: backend

spring.cloud.aws:
    credentials:
      access-key: ${AWS_ACCESS_KEY_ID}
      secret-key: ${AWS_SECRET_ACCESS_KEY}
    region:
      static: ${AWS_REGION}
    s3:
      enabled: true
    dynamodb:
      region: ${AWS_REGION}

moments:
  s3:
    bucket: ${BUCKET_NAME}
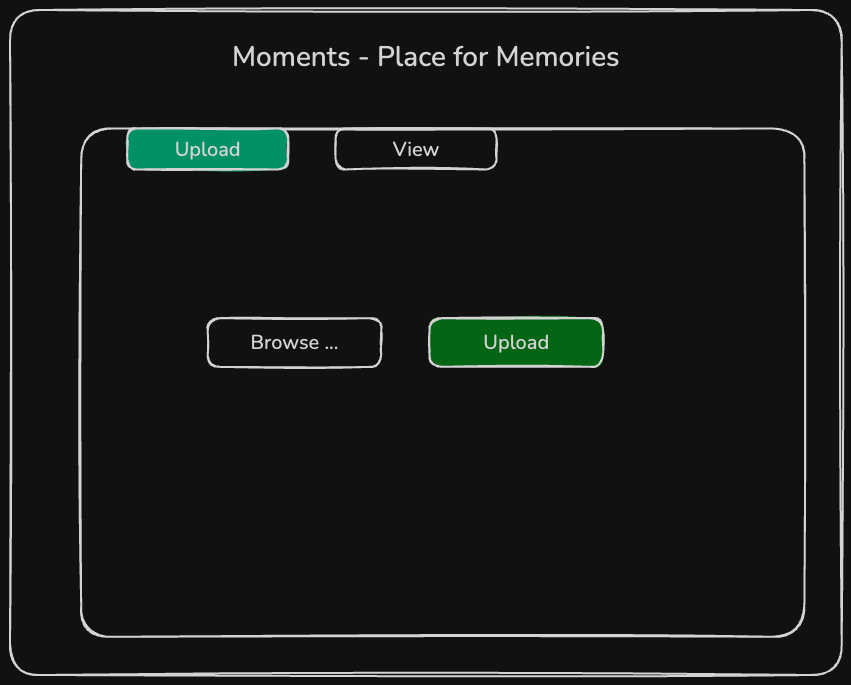
Upload a Photo
A photo can be uploaded under the Upload tab.
Frontend
To upload a photo to S3, the frontend will call the /api/uploads API.
[App.js]
const formData = new FormData();
formData.append("file", selectedFile);

const response = await fetch("http://localhost:8080/api/uploads", {
method: "POST",
body: formData,
    });
Backend
Frontend will run on http://localhost:3000, and the backend will run on http://localhost:8080.
To prevent CORS errors, annotate the controller classes with @CrossOrigin(origins = "http://localhost:3000").
The backend API for uploading photos will save the photo to S3 and store metadata, such as the location URL, in DynamoDB.
[UploadController]
  String key = s3UploadService.upload(file);

  // Replace with your CloudFront domain
  String url = String.format("https://d2zkx2tprcx426.cloudfront.net/%s", key);

  photoDynamoRepository.save(key, url, file.getOriginalFilename());

  return ResponseEntity.ok(new UploadResponse(key));
To upload a photo to S3, we will use the S3Template class.
Create a unique key that will be used to reference a photo.
[S3UploadService]
  String key = "photos/" + UUID.randomUUID() + "-" + file.getOriginalFilename();

  s3Template.upload(
          bucketName,
          key,
          file.getInputStream()
  );
We need to save the photo’s URL as metadata in DynamoDB. This helps in retrieving photos in chronological order.
To interact with DynamoDB, we use DynamoDbTemplate.PhotoItem is the model class representing the object to be saved in the database.
  @DynamoDbBean
  @TableName(name = "moments_photos")
  public class PhotoItem {

      private String pk;
      private String sk;
      private String url;
      private String s3Key;
      private String description;
      private Instant uploadDate;

      @DynamoDbPartitionKey
      public String getPk() {
          return pk;
      }
Table moments_photos will be created automatically once the application is deployed. This is managed by Spring Cloud AWS under the hood using the @TableName annotation.
We need to define a DynamoDbTableNameResolver to resolve custom table names that differ from the class name, as is the case here.
  @Component
  class CustomTableNameResolver implements DynamoDbTableNameResolver {

      @Override
      public <T> String resolve(Class<T> clazz) {
          return clazz.getAnnotation(TableName.class).name();
      }
  }
@DynamoDbPartitionKey marks the partition key. In this example, we use the constant PHOTO as the partition key. In production, the partition key is typically dynamic and is used to distribute data across partitions based on its value.
We use sk (Sort Key) to store items in a specific order. In this case, we are using it to store items in chronological order based on the current time.
Save the PhotoItem.
[PhotoDynamoRepository]
  public PhotoItem save(String s3Key, String url, String description) {
      Instant now = Instant.now();
      String sk = ISO.format(now) + "#" + UUID.randomUUID();

      PhotoItem item = new PhotoItem();
      item.setPk(PARTITION_KEY);
      item.setSk(sk);
      item.setS3Key(s3Key);
      item.setUrl(url);
      item.setDescription(description);
      item.setUploadDate(now);

      return dynamoDbTemplate.save(item);
  }
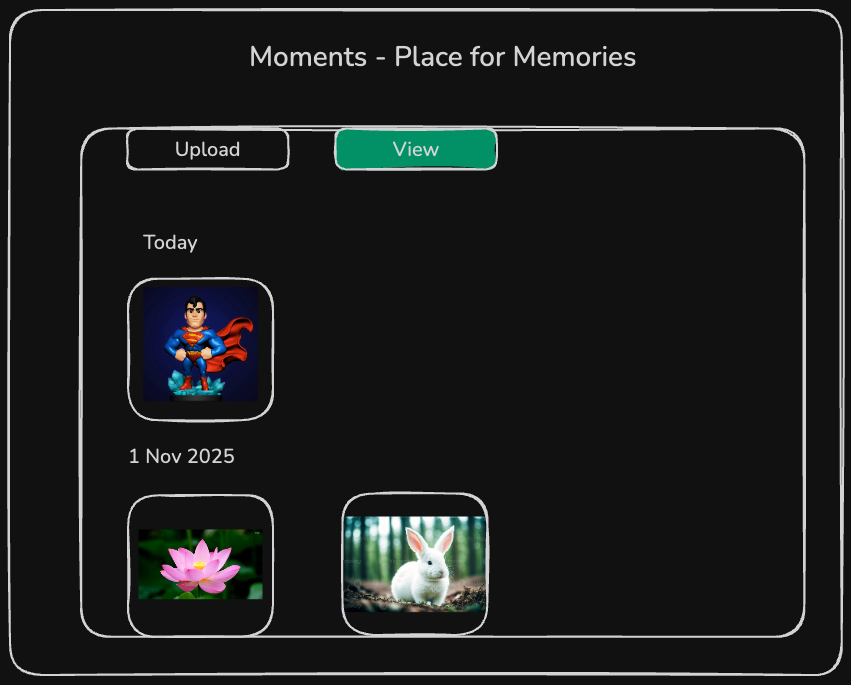
View Photos
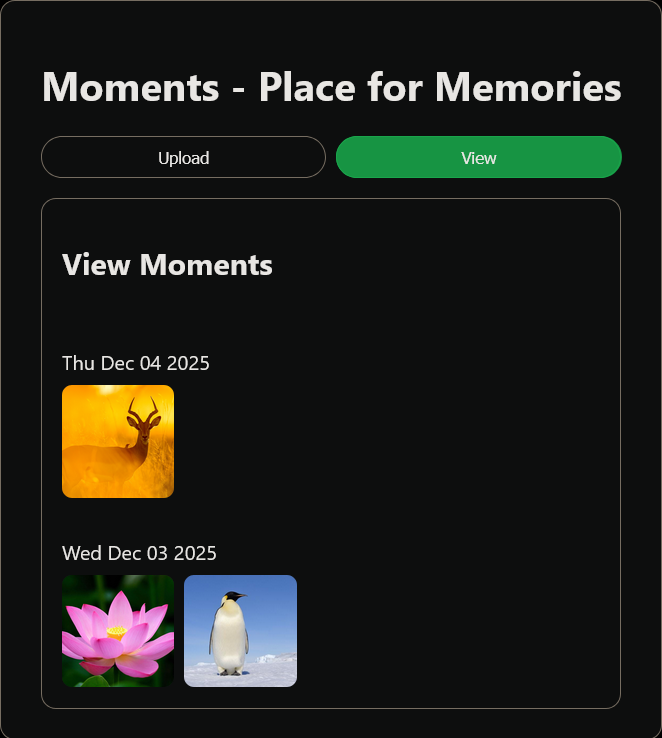
Uploaded photos can be viewed under the View tab. Photos are displayed in chronological order.
Frontend
The frontend will call the /api/photos endpoint to retrieve a list of photo items from the backend.
[App.js]
  const response = await fetch("http://localhost:8080/api/photos");
  if (!response.ok) {
    throw new Error("Failed to load photos");
  }
Backend
Following API will call DynamoDB to retrieve a list of photos in chronological order.
[PhotoController]
  @GetMapping
  public List<PhotoItem> listPhotos() {
      return photoDynamoRepository.findAllNewestFirst();
  }
We will use the DynamoDbTemplate class to query items from the table.
PageIterable<PhotoItem> result = dynamoDbTemplate.query(queryEnhancedRequest, PhotoItem.class);
Run the Application
Run the frontend on the default port 3000.
To install any missing npm libraries, run:
npm installStart the frontend server:
npm start
Run the backend on the default port 8080.
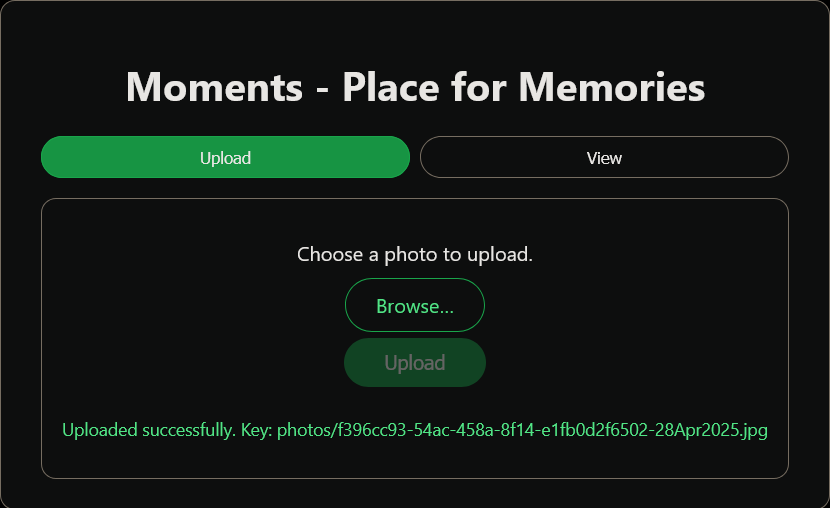
Upon successfully uploading a photo, you will receive a confirmation message:
View uploaded photos in chronological order:
Congratulations 🎉! We have successfully uploaded and viewed photos using AWS services.
Summary
In this post, we have implemented the frontend and backend for the Upload and View features. Currently, both the frontend and backend are running on the local machine. Photos are stored in S3, and associated metadata, such as the URL location of the photos, is stored in DynamoDB.
In the next post, we will make the application fully cloud-native by deploying both the frontend and backend to AWS.